
It’s no secret that gardening—whether you have green thumbs or not—is something that will ultimately test your patience. Fortunately, I have a list of fast-growing vegetables from seed that promises quick-harvest success!
I know, I know. Plants need time to grow. Even more so when you’re growing vegetables from seed to harvest.
The amount of time and effort required for home-grown veggies can intimidate any curious and would-be gardeners. Even I was intimidated when I first attempted to grow my own vegetables at home.
But I promise you. All that doubt about home gardening will melt away as soon as you taste the literal fruit of your labor. Once you finally harvest your own vegetables, you’ll realize that gardening isn’t that complicated after all!
That’s why I’m so excited to share with you the fastest growing vegetables you can easily grow at home. Some of these veggies don’t even require a full month of growing. Yup, some of these plants will be ready for harvest in just 20 days.
It’s that fast.
So whether your a beginner gardener or an expert one with a short growing season, I’m sure you’ll enjoy what I’ve compiled below.
“Good things come to those who wait,” sure. But luckily for us, with these vegetables—we don’t have to wait for too long.
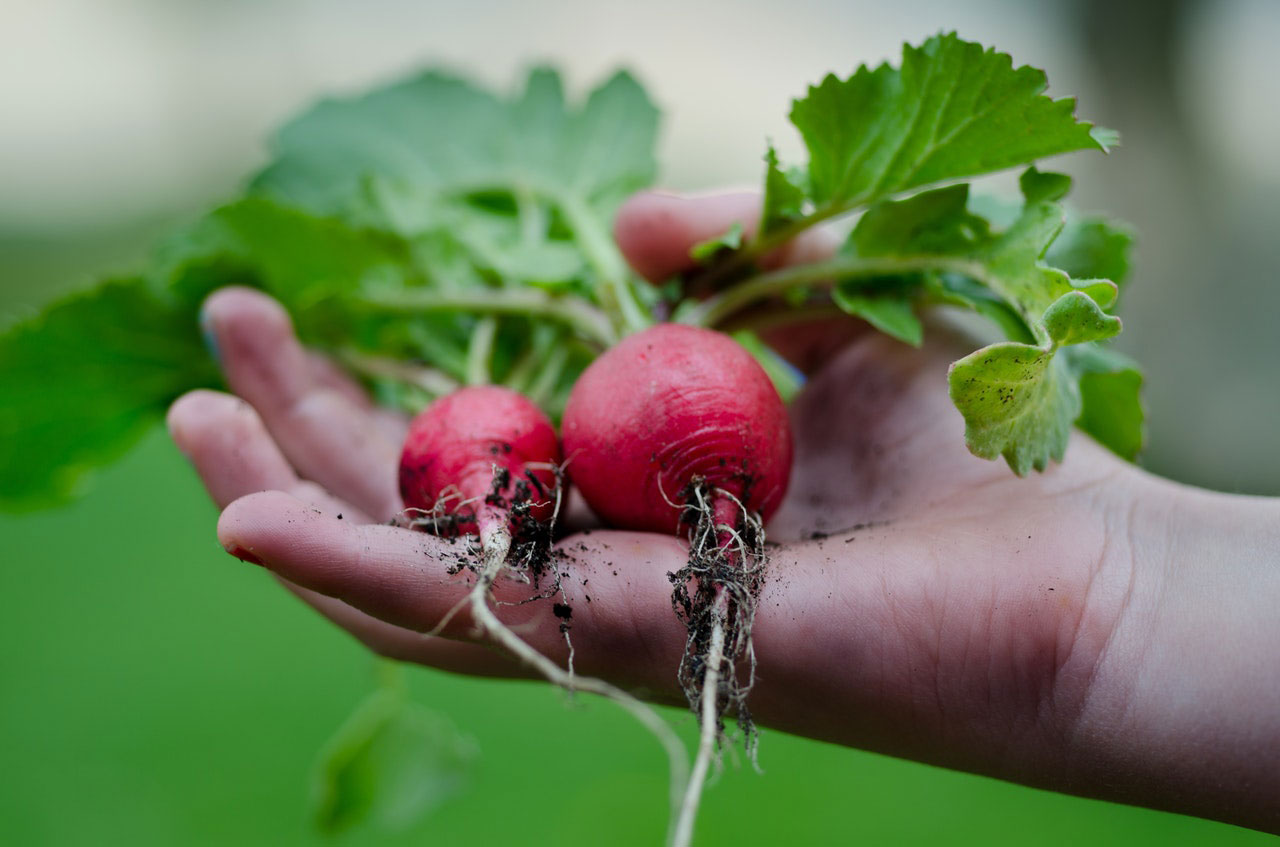
Radishes
Time from planting to harvest: 21 to 30 days
This easy-to-grow root vegetable is not only known for its ridiculously low-maintenance plant care, but also for how quick-growing it is. You only have to wait for 21 to 30 days for this vegetable to mature and you’ll be harvesting a large batch of radishes in no time.
How to Plant Radishes
- Get a container that is at least 6 inches deep so the roots can develop and reach its desired size with enough space.
- Fill your container with a good quality potting mix to the brim.
- Add water to moisten the mix.
- Sow seeds ½ inch deep and 1 inch apart. Make sure that there’s at least 1 inch of space left from the edge of your container to your first set of radishes.
- Keep soil moist and place the container in a sunny area.
- Seeds will germinate in 5 to 10 days.
- Thin the seedlings so there each plant is 2 inches apart from each other.
- Keep soil moist but not soggy.
How to Harvest Radishes
Most varieties are ready for harvest in just 23 days. To check if your batch of radishes is in a good size for harvest, uncover the tops of each plant to gauge its size. When the radish is slightly thicker than your thumb, it’s good to go.
To harvest, pull the radish from the ground. Grip it by the top of the root and not by its leaves ‘cause they break easy. Once harvested, quickly separate the leaves from the root so it won’t shrivel.
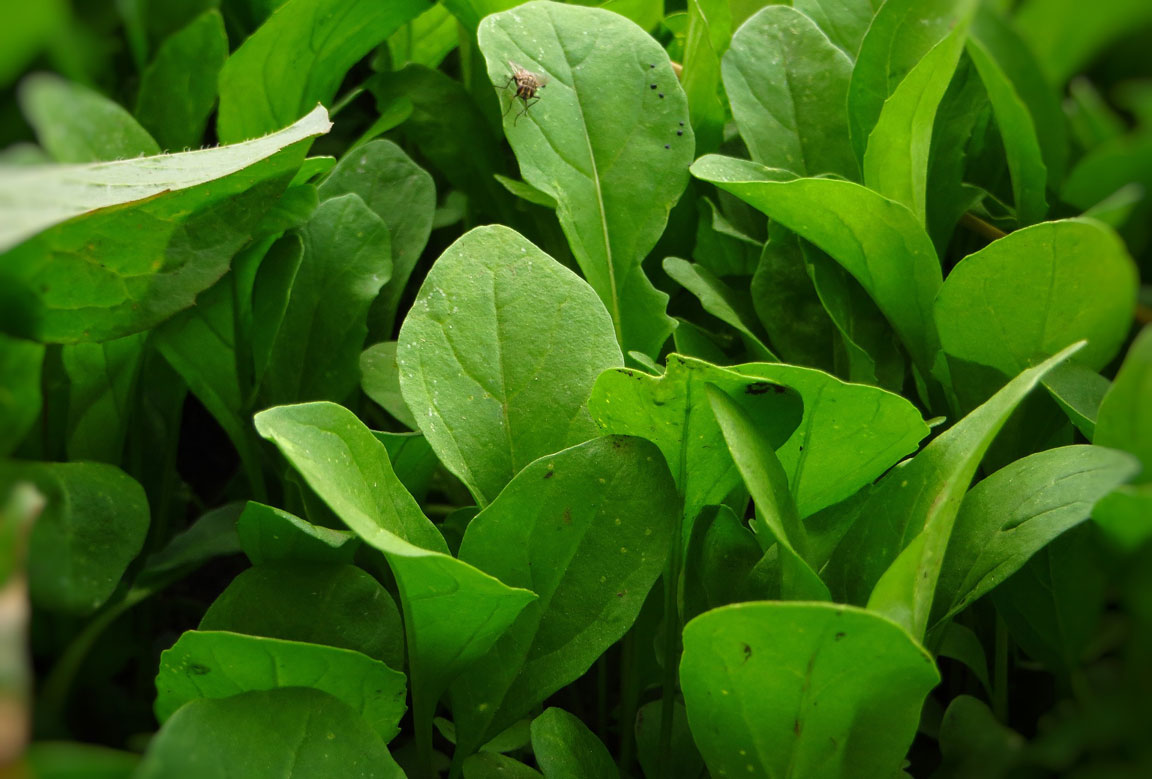
Arugula/ Rocket
Time from planting to harvest: 20 to 40 days
20 to 40 days. That’s how long you need to wait for your own fresh batch of Arugula. This tangy and mildly spicy salad green is a fast-growing vegetable that you should definitely consider growing. Especially in the cool seasons.
How to Plant Arugula
- Get a wide container, it doesn’t have to be deep since the roots of arugula are shallow.
- Fill your chosen container with a quality potting mix.
- Gently flatten it out by patting it with your hand.
- Distribute the seeds uniformly (space them at least 1 inch apart).
- Pat the seeds onto the soil. Do this gently.
- You can choose to cover them lightly with a potting mix again or use a seed-starting mix over the seeds.
- Gently pat them again.
- Carefully add water making sure that you don’t disturb the seeds. You don’t want them to get in the soil too deep.
How to Harvest Arugula
In just 40 days or 3 to 4 weeks depending on the variety and growing conditions, your arugula will be ready for harvest. So fast, right? Don’t delay harvesting the plant, the older they become, the bitter they get. Plus, the young leaves are the best tasting. They’re tender and crisp.
Pick them off using shears when they are 2 to 5 inches (5-7.5 cm) long. You can harvest the whole plant too. Just cut the whole thing just above the root. You can also harvest as you need by only cutting individual leaves. The arugula will re-grow new leaves you can harvest in a few days.
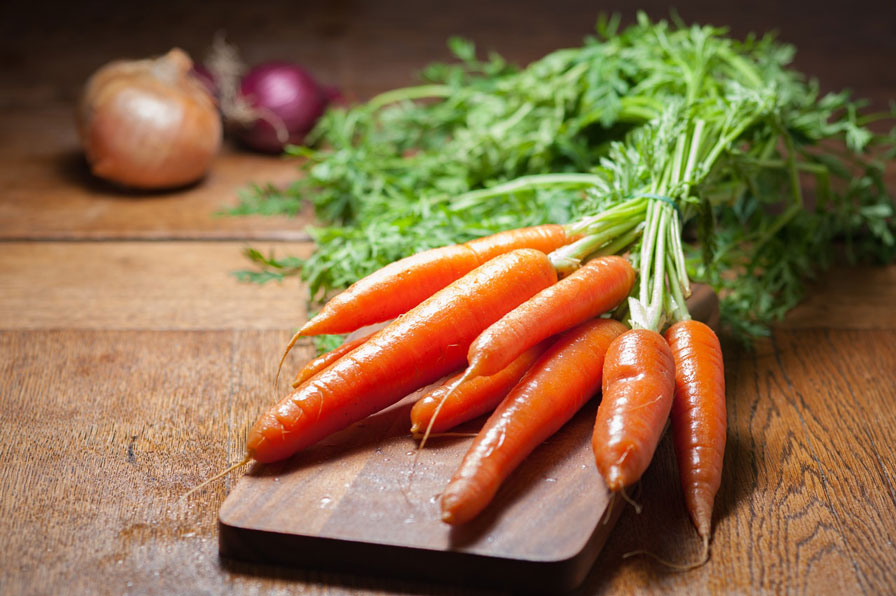
Carrots
Time from planting to harvest: 55 to 65 days
Even if your kid isn’t the biggest fan of vegetables, I’m sure you won’t have any problems feeding them carrots. You can serve this crunchy vegetable as a snack or add them to stews and other dishes. Most varieties are ready for harvest in about 55 to 65 days.
How to Plant Carrots
- Get a pot or a window box that is 8 to 12 inches deep with drainage holes at the bottom. The longer the carrot variety is, the deeper the pot should be.
- Fill the container with potting mix up to an inch from the top and water the soil.
- Press the carrot seeds ¼ inch deep and 1 inch apart.
- Plant in rows that are 6 inches apart.
- Cover the seeds with a thin layer of soil and water sparingly.
- Place the container in a sunny spot.
- Keep them moist but don’t drown them. In two weeks, seeds will germinate.
- Thin the seedlings so they’re 1 inch apart from each other.
How to Harvest Carrots
To check if your carrots are ready for harvest, look at the carrot top just below the green stem. If it’s already grown ½ inch in diameter, it’s ready. If you can’t see the carrot top, it’s okay to brush some of the soil lightly so you can gauge its size.
Grab the carrot by its root. Gently twist or wiggle them around and pull them straight up. If the soil is a bit hard, water it and wait for an hour before attempting to pull the carrots again. Remove the greens once the carrots are harvested. Remove excess dirt and let them dry before storing them in the fridge.
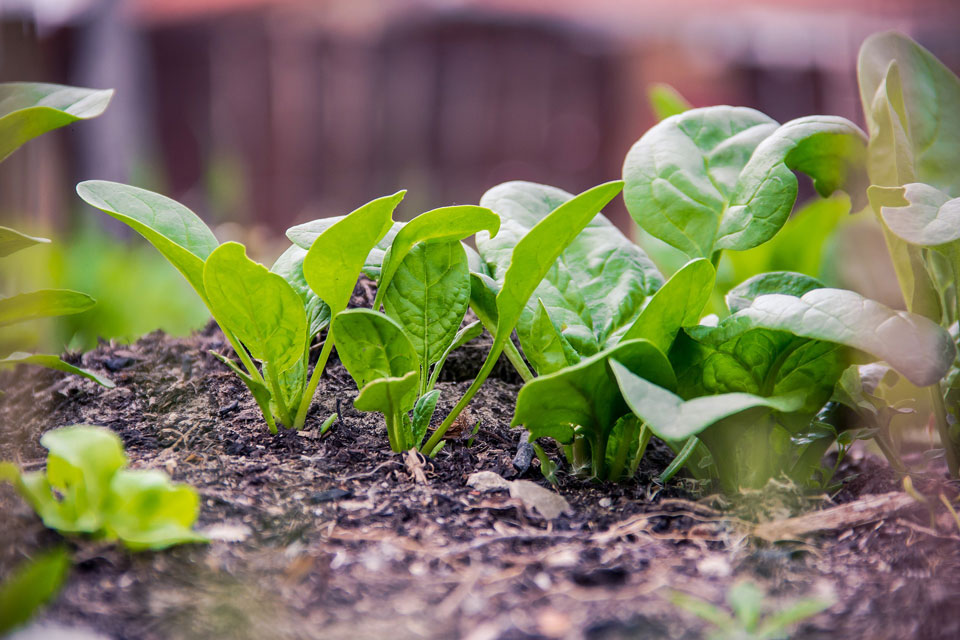
Spinach
Time from planting to harvest: 30 to 55 days
This quick to grow vegetables is a popular salad green and a powerhouse when it comes to nutritional content. Packed with important vitamins and minerals like iron and potassium, it’s no wonder that Popeye was downing this veggie by the canful. Ready for harvest in 30 to 55 days.
How to Plant Spinach
- Soak the seeds for several hours before planting (for quicker germination).
- Get a 6 to 12 in. pot.
- Fill with pre-moistened quality potting mix.
- Sow spinach seeds ¼ to 1 inch deep.
- Space seeds at least 2” apart (if you want to skip thinning, space them 4-6” apart).
- Cover the seeds lightly with soil.
- Gently press down the soil.
- Water until the soil is evenly moist but not soggy.
- Place somewhere sunny.
How to Harvest Spinach
Start harvesting spinach when you see your spinach plant having at least six leaves that are 3 inches long. This usually happens in six to eight weeks. Carefully pick and cut the outer leaves first when they’re large enough to eat so the inner leaves will continue to grow.
You can also choose to cut the entire plant just below the soil level with a garden knife if you see signs of bolting. By harvesting the entire crop, you will encourage the plant to regrow giving you a fresh start.
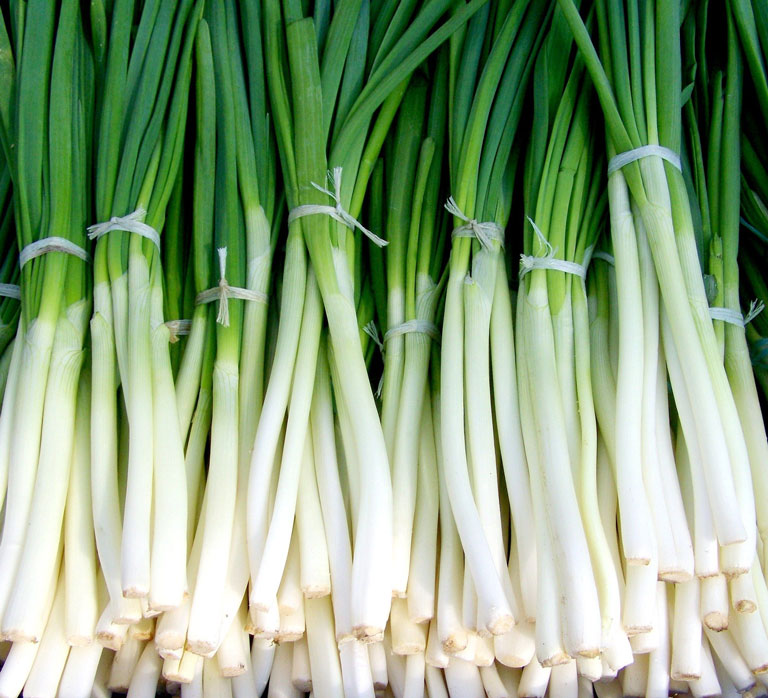
Green Onions
Time from planting to harvest: 20 to 30 days
Gardeners enjoy growing onions and it’s not hard to see why. Not only is it easy and quick to grow, but it’s also one of the highest yielding crops. This rewarding plant only requires 20 to 30 days for the green onions and about 60 to 120 days for the bulb itself.
How to Plant Green Onions
- Get a pot or container that is at least 6 to 8 inches deep. A wide container is preferable if you want to plant more scallions. Make sure there are enough drainage holes at the bottom.
- Fill the container with multipurpose compost up to an inch from the top.
- To moisten the soil, add some water to the compost and mix.
- Sow seeds in rows that are 1 inch apart.
- Cover lightly with compost and mist the soil.
- Keep soil moist and place the container in a sunny area.
- When the plant reaches 4 inches in height, thin them so they’re 1 inch apart. And also mound some soil up around its base. Harvest when they are 6 inches tall or taller.
How to Harvest Green Onions
You can start harvesting scallions when they’re at least 8 inches tall. At this point, the scallions should be green and upright. The younger the scallion or the faster you harvest them, the milder the flavor you’ll get.
Grab the whole plant and cut it 1 inch from the soil. This will encourage regrowth and boost your yield. Easy, right?
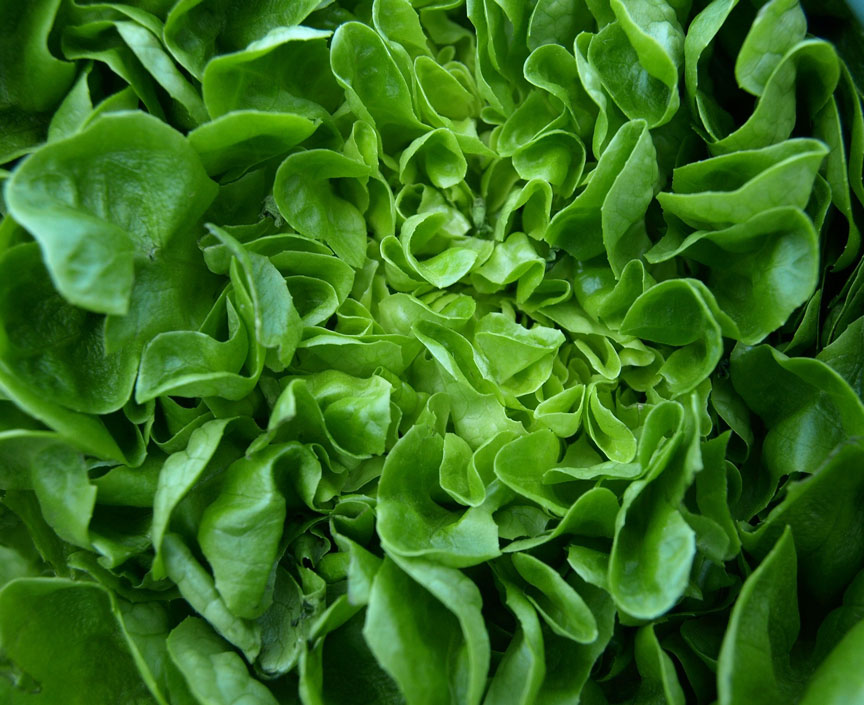
Lettuce
Time from planting to harvest: 30 to 56 days
You probably love the crispness and subtle sweetness of this leafy vegetable on salads. Well, the statistics show that lettuce is the top planted salad vegetable in the United States. Gardeners certainly love growing this annual plant since it is fast and easy to grow. With just 30 days, some varieties could be harvested readily. While some varieties take six to eight weeks to grow.
How to Plant Lettuce
- Although this plant could thrive even in extreme weather conditions, plant the seeds four to six weeks before your last spring frost date.
- Plant the seeds a quarter to half-inch into the soil and cover with soil. The plant will emerge seven to ten days after.
- Afterward, water the soil thoroughly but be sure not to overwater the soil.
- When the plant has 3 to 4 pieces of true leaves, start thinning.
- Allocate at least 12 to 15 inches of space between each plant.
- After three weeks, fertilize the plant using alfalfa meal or fertilizer that is high in nitrogen to keep the lettuce from growing fast and strong.
How to Harvest Lettuce
You could start harvesting seeds when it reached full size but not overmature. This is because lettuce tastes better and is crisper when they’re still young. Overmature leaves could result in bitter and woody leaves. So before reaching full maturity, you could harvest the outer leaves first to keep them at the best quality.
Wash the leaves and air dry it to prevent molds from growing. Then, wrap it in plastic before storing it in your refrigerator. This could last up to ten days.
Continue with harvesting the leaves until the plant cannot produce any more or the quality of leaves is no longer at best quality. Once it reaches that point, start again from scratch, or in this case, from seeds.
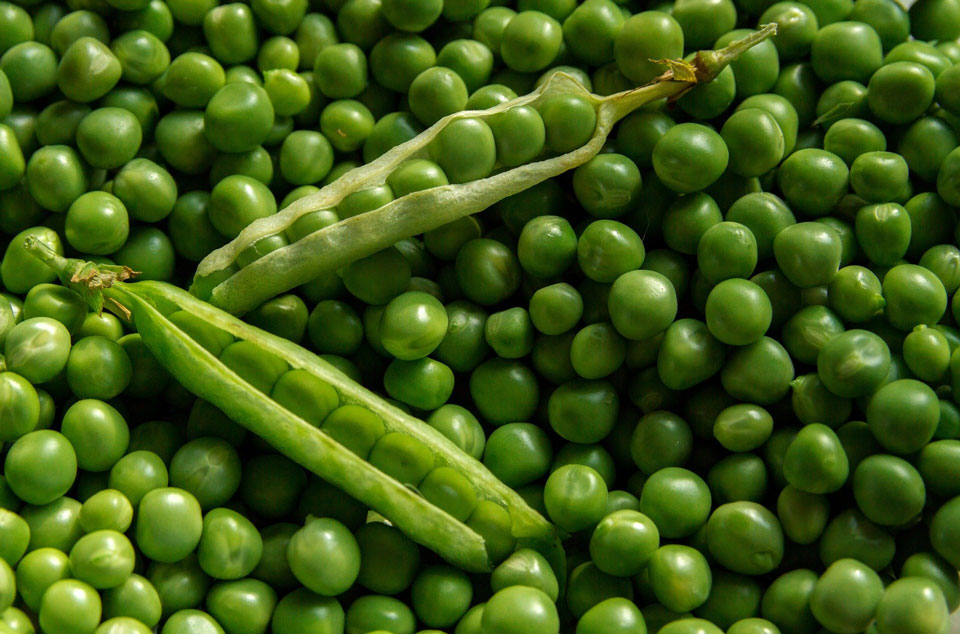
Peas
Time from planting to harvest: 60 days
Peas only take ten days for peas to germinate and 60 days for it to be harvested. It’s a low maintenance plant that needs little attention other than watering and harvesting. Pretty easy, right? It also works well with other plants as it fixes the nitrogen on the soil, making it available to other plants close to it.
How to Plant Peas
- Prepare the soil by mixing organic compost to give it enough nutrients. Then add wood ashes and bono meals to provide phosphorus and potassium.
- Place wire nettings on the garden bed to ensure that pea plants will receive enough support when it starts to grow tendrils.
- Plant seeds one inch deep into the soil and leaving at least 2 inches of space apart from each other. Then, leave a 12 – 24 inches of space apart for the next row.
- Water the seeds, but do not over-water to avoid extra moisture.
- Once the plant starts to flower, apply a thick mulch of manure and compost into the soil to trap moisture.
How to Harvest Peas
Harvesting peas is best done in the morning. The peas tend to be crispiest before they receive full sunlight. To harvest, pick with both hands. Use your one hand to hold on the vines and use the other to remove the peas off the plant. Avoid using scissors or other gardening tools to avoid damaging your plant.
Peas should be consumed immediately as it may reduce its freshness in just five days. But you could also make your peas frozen so that you could still consume it after a few days
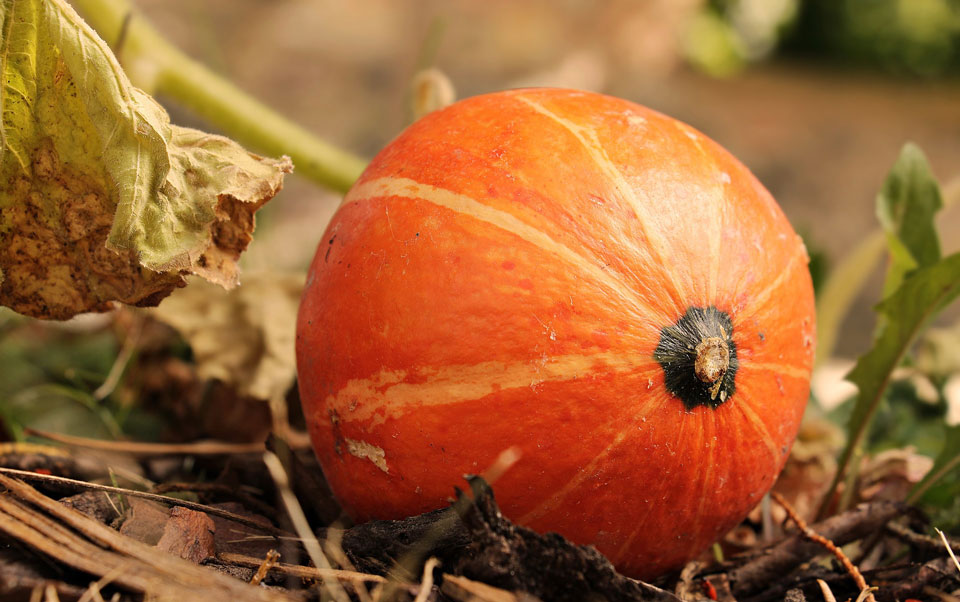
Squash
Time from planting to harvest: 70 days
Squash isn’t just the type of vegetable that shows up on Halloween. There are actually a lot of meals you could prepare with it and a lot of products to eat it with. It is really fast to grow with only 70 growing days before harvest. One plant could produce a lot of crops, that’s why a lot of gardeners have them in their garden. But do you know there are actually two types of squash? The winter and summer!
How to Plant Squash
- Choose a planting site that receives full sun exposure.
- Prepare the garden bed by mixing compost and other organic matter into it.
- You should plant the seeds one to two inches deep into the soil and 2 to three inches apart.
- Water the soil evenly to avoid making the soil soggy.
- Place a row cover or frame protection if your planting on a cold climate.
- Thin the garden bed once the seedling has enough true leaves.
- Apply mulch around the plants to provide a healthy environment for the roots to thrive, to prevent weeds from growing, and to trap moisture in the soil.
How to Harvest Squash
Since there are two different varieties of squash, follow two different steps also when harvesting:
You could harvest summer squash while it’s still young (around 6 to 8 inches long). The small squash is better tasting and really tender. Use a sharp knife when cutting the crop out of the vine. Just make sure to leave at least an inch of the stem on the fruit. Your harvest could last up to ten days if stored in the refrigerator.
On the other hand, winter squash is usually harvested in September or October. It should be matured enough when harvested. Use the same method of harvest as the summer squash through the use of a knife. Then, store it in a cool dry location. This could last up to one to six months, depending on the variety you chose to plant.
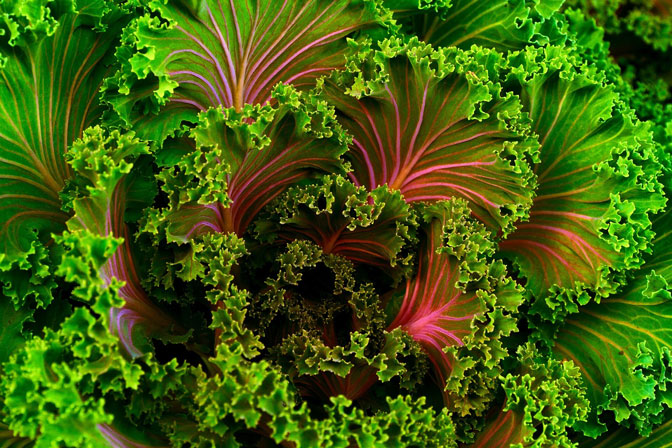
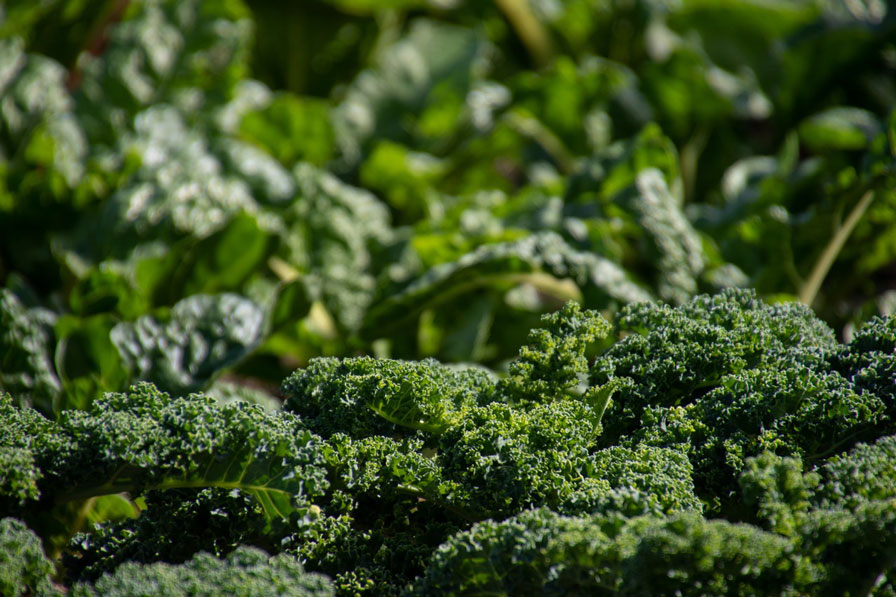
Kale
Time from planting to harvest: 50 to 65 days
Kale is a known superfood that carries a lot of nutrients beneficial to our body. It is part of the green and leafy cabbage family. Aside from the rewarding component it could provide our body, it is also exceptionally fulfilling to plant. After 25 days, you could already start getting baby mature leaves, but for fully mature leaves, you should wait 50 – 65 days.
How to Plant Kale
- Plant kale anytime. But for best results, plant it early spring to early summer.
- Prepare the soil by placing 1 and a half cups of 5-10-10 fertilizer per 25 feet of row into the top three to four inches of the soil.
- Put organic matter in well-draining soil.
- Plant the seeds into the soil with approximately a quarter to half-inch deep into the soil.
- Cover lightly with soil.
- Place 12 inches of space between each plant and 18 to 24 inches per row.
- Then, water the soil lightly just to avoid overwatering the plant.
How to Harvest Kale
The plant will let you know if it’s ready for harvesting. When the green leaves of kale are too enticing to eat, then, you’re ready to harvest. To harvest, you have to pick the outer leaves first. Get your gardening scissors or a sharp knife and cut the leaves one by one by starting with the outermost first. Over time, leaves will regrow at the center of the head.
The freshness of Kale could last up to one week if stored properly on your refrigerator. But if you wanted to prolong the storage, you could also freeze them. Just blanch them and air dry it. Once completely dry, you could place it on a baking sheet and freeze it.
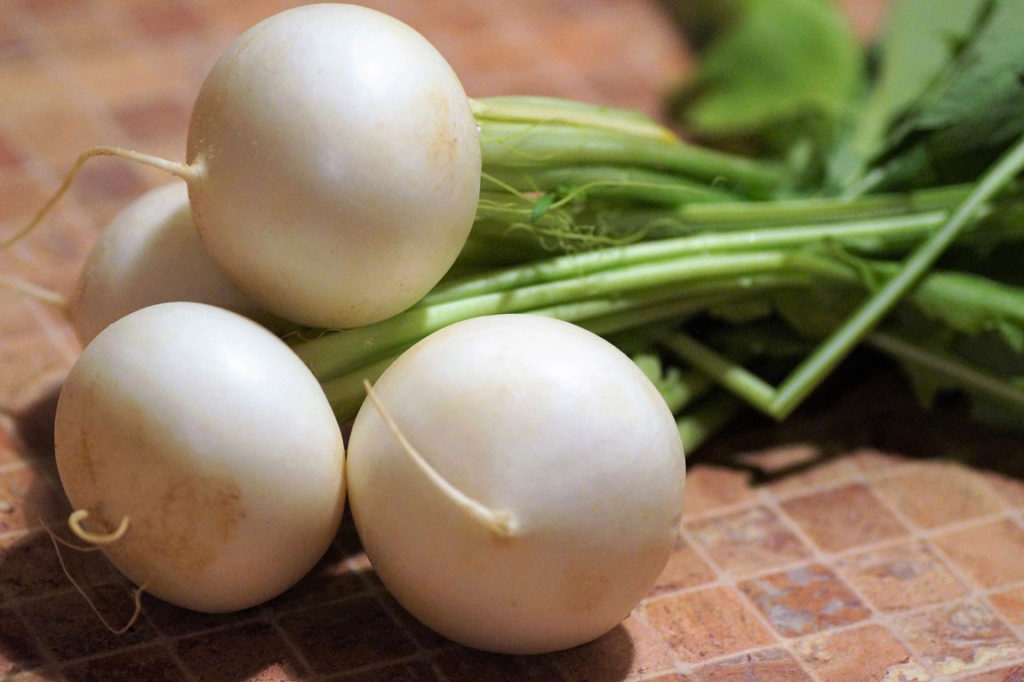
Turnips
Time from planting to harvest: 30 to 60 days
Most parts of turnips are really usable. You could either eat the beets or the greens. But either way, this crop is really fast to grow. After just one month, you could enjoy the mustard-like leaves of turnips. After two months, the beets have fully matured and could be harvested already. In addition, it is also highly versatile and low maintenance which would be perfect for beginners like you.
How to Plant Turnips
- Find a space in your garden that gets full sun exposure.
- Loosen the soil up to 12 to 15 inches deep to ensure that it is well-draining.
- Scatter the turnip seed into your garden.
- You won’t need to cover the seed. Just sprinkle enough water for the seed germination.
- When the seedlings reach four inches in height, start thinning the garden bed. You should allow four to six inches apart from each other.
How to Harvest Turnips
After one month of sowing date, you could now harvest your turnips leaves. It’s best that the greens are still young as it is better tasting than the others. Then, you could harvest the beets after nearly two months or when the plant reaches four inches. The bulbs are also tastier when small, you could pull one out to see for yourself just to make sure.
Place the turnips in a perforated plastic bag. Then, It could be stored for 3 – 4 months in a refrigerator just at home.
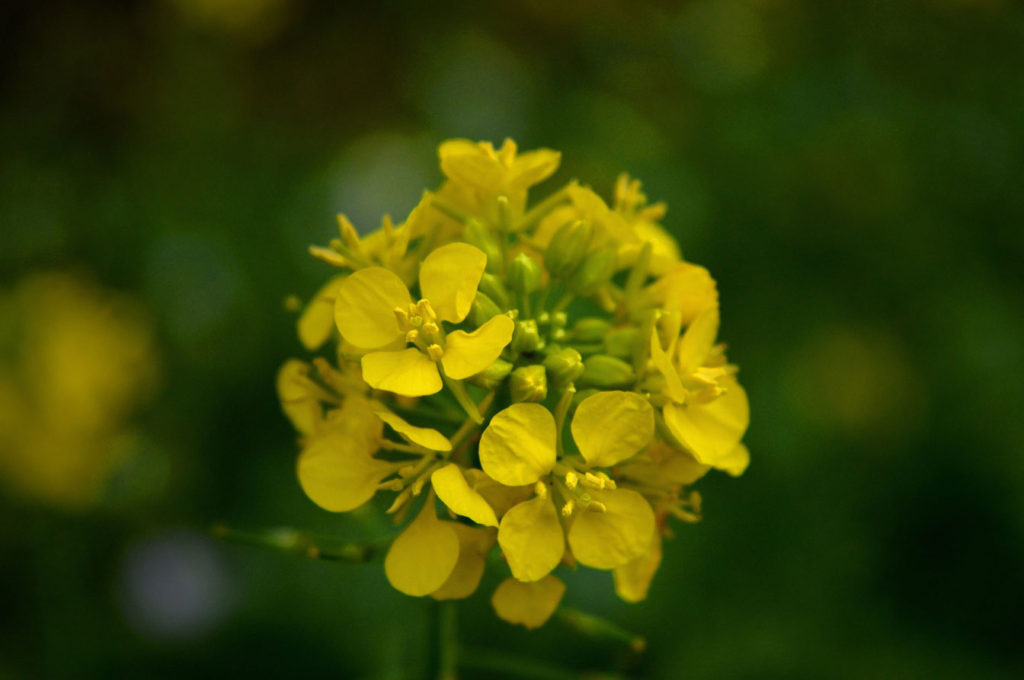
Mustard
Time from planting to harvest: 21 – 45 days
If you’re looking for a leafy vegetable that will give you a strong peppery flavor, then you should definitely try growing Mustard at home.
This hardy plant is perfect for beginners. You’ll have no problem planting and growing this vegetable from seed. It’s low maintenance and quick-growing! It only takes 21 to 45 days for this plant to be ready for harvest.
How to Plant Mustard
- Get a pot at least an 8-inch (20 cm) one with enough drainage holes at the bottom.
- Fill the container with good quality organic potting mix up to 1 to 2 inches from the brim.
- Add water and mix until the potting mix is properly moist, pat evenly.
- Sow mustard seed ½ inch deep. Spacing isn’t strict at this point. We’ll thin them out later.
- Cover lightly with potting mix. Mist with water.
- When seedlings mature, thin them from 4 to 8 inches apart in rows 12 to 24 inches apart. Adjust spacing with your chosen container.
- Make sure to place your pot in a warm sunny location.
How to Harvest Mustard
Pick or cut off individual leaves when they reach 3 to 4 inches in length. The younger the leaves, the more tender they are. You may also opt to cut the entire plant from the base to use as a whole.
Make sure you finish harvesting before the weather grows hot. The hot weather will make your leaves tough and strong to taste. The plant will eventually go to seed so make sure to complete harvest by then.
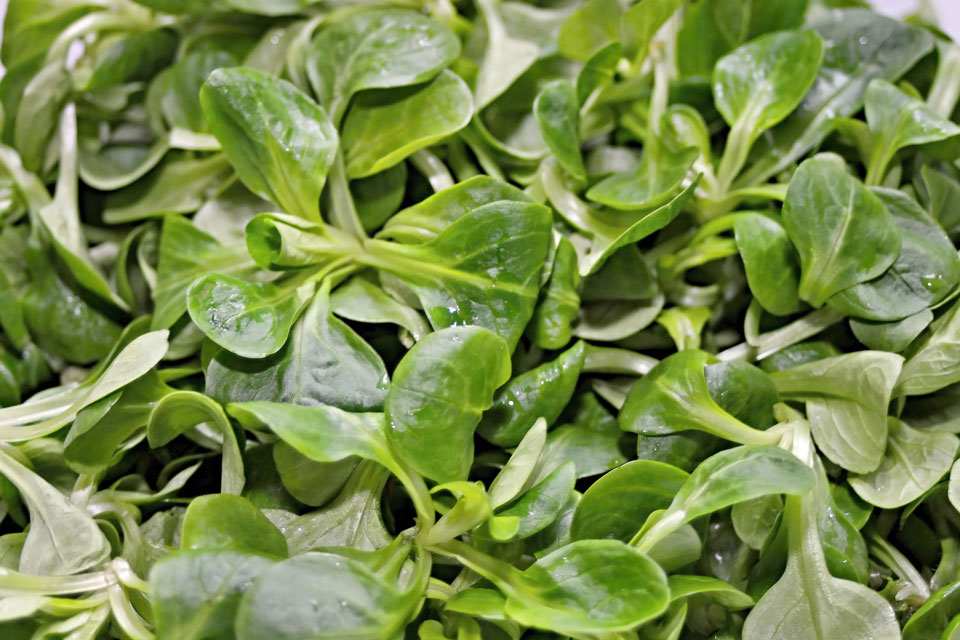
Mache or Corn Salad
Time from planting to harvest: 45 to 50 days
Want a fuss-free plant that only needs 45 to 50 days to fully grow? Then give Mâche a try. You’ll love the sweetness and the slightly nutty taste of this salad green. I usually pair mine with Cilantro and Lime plus a bunch of zesty ingredients for a simple refreshing salad.
How to Plant Mache
- Get a large pot or planter with enough drainage holes at the bottom.
- Fill the container with a good quality organic potting mix until 1 inch from the brim.
- Add water and mix thoroughly until evenly moist.
- Press the soil until even.
- Sow the seeds evenly.
- Cover with ½ inch potting mix.
- Mist with water.
How to Harvest Mache
Treat it as a cut-and-come-again plant. Start with the outer leaves first, when they are about 3 inches long. Do not cut the rosette to allow regrowth and more leaf production.
Alternatively, you can just slice an entire head, and cut it from the base of the plant. But doing so will stop the plant from regrowing. Mache is often served raw and eaten fresh in salads.
Broccoli
Time from planting to harvest: 48 to 95 days
Broccoli is one of my favorite vegetables because of its unique earthy taste. Plus it’s incredibly packed with vitamins and minerals good for your health. In fact, it was called the “crown jewel of nutrition.”
How to Plant Broccoli
- Find a location in your garden that enjoys full sun exposure.
- Place manure or compost on the first 2 to 4 inches of soil.
- Plant the seeds in early spring. Sow it half an inch deep into the soil.
- Place a 3 inches distance between each seed.
- Cover the plant by tapping soil gently.
- Water well and evenly.
How to Harvest Broccoli
Wake up early in the morning and head over to your garden immediately. This plant requires harvest time early in the morning. Use a garden knife when cutting the head from the plant. Cut the head at least six inches of stem and with angle.
Then, wash the crops and air dry it. Make sure to fully dry the vegetable to avoid molds from growing. When stored in the refrigerator, this could last up to 5 days. You could also blanche and freeze this crop for longer storage.
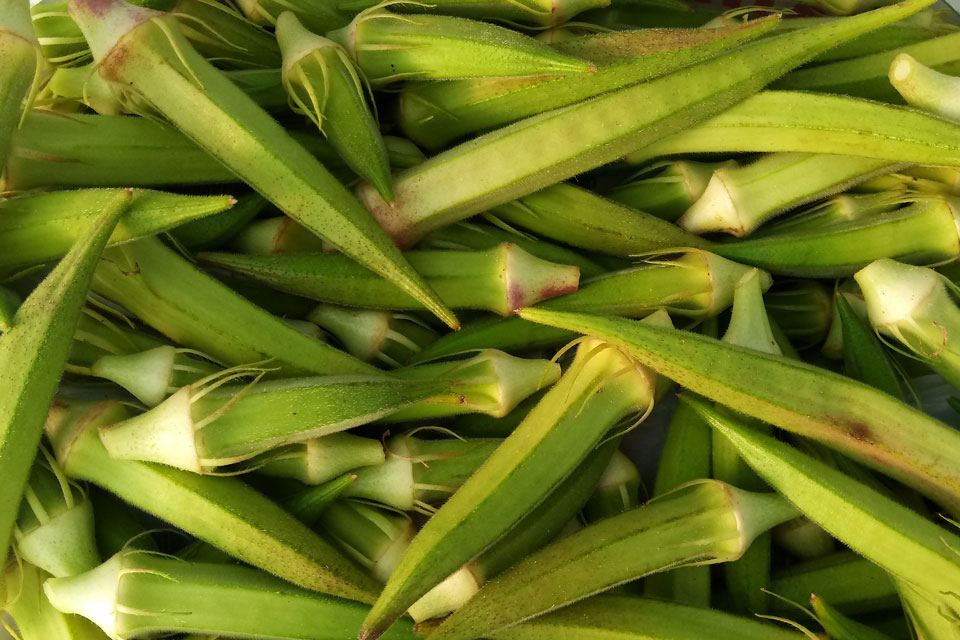
Okra
Time from planting to harvest: 60 days
Okra, a warm-weather plant, is amazingly rewarding when planted. While it is high in Vitamin A and low in cholesterol, it also blooms all throughout its planting duration. In addition, this plant could thrive really easily without too much attention and care.
How to Plant Okra
- Find a space in your garden with full sun exposure.
- Soak the seeds in lukewarm water overnight.
- Directly sow the seeds into the garden bed 3 to 4 weeks before the last spring frost.
- Make sure to leave 12 – 28 inches of space between seeds and 2 feet between rows.
- Cover the seeds with half to one inch of soil.
- Water evenly.
- Cover the plants with a cold frame or grow tunnel to ensure that heat is trapped.
How to Harvest Okra
Mature okra grows 2 to 3 inches long. Wear long sleeves and gloves when harvesting to prevent itching and irritation brought by the spiny stems. Cut the crop just above the head of the crop. You could harvest the crops every other day.
You could store your harvested okra on your vegetable chiller. This could last up to 7 to 10 days.
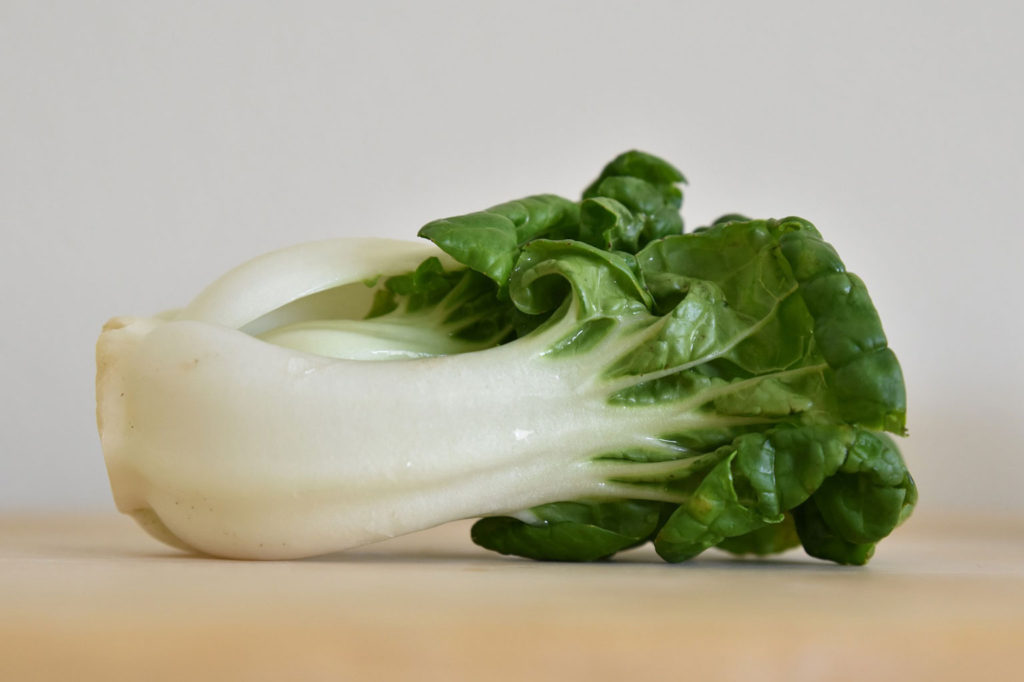
Bok Choy
Time from planting to harvest: 45 to 60 days
You probably heard or tasted bok choy from a Chinese restaurant. This vegetable is popular on wonton soups or mami. The mild taste of this vegetable complements the clean and mild taste of the soup. Grow your bok choy at home as it is really fast to grow.
How to Plant Bok Choy
- Choose a location with partial shade.
- Prepare your soil by adding fertilizer into the soil.
- Sow seeds quarter to half an inch into the soil during fall.
- Put an inch apart when planting the seeds.
- Place soil to cover the seeds.
- Water thoroughly.
- Plant seeds every two weeks for continuous harvest.
How to Harvest Bok Choy
The duration and appearance of maturity will depend on the variety of Bok Choy you planted. Normally, this plant could be harvested when it reached 12-24 inches. To harvest, cut the plant from the ground by using a garden knife.
This vegetable is easily perishable, so make sure to consume the product immediately. If placed in the refrigerator, it could last only up to 3 – 4 days.

Bush Beans
Time from planting to harvest: 50 to 60 days
Bush beans are a type of beans that do not need support to stand upright. It is really fast and easy to grow which requires minimal attention and care. It would be perfect for people who have limited space too! It is a good source of vitamins and protein to complete your diet.
How to Grow Bush Beans
- Prepare the soil with manure or compost. Bush beans could fix the nitrogen content of its soil, but for best results, fertilize the soil.
- Sow the seeds half an inch to one inch deep into the soil after the last spring frost.
- Place rows with 18 inches apart.
- Cover the seeds with soil.
- Water well but not heavily.
- Plant beans every two weeks for continuous growth.
How to Harvest Bush Beans
Beans contain a high sugar level, especially in the morning. So grab your sneakers and head to your garden. Pick green beans that are thick and firm. Look for beans that are not yet fully matured or overly matured; look for younger bush beans.
You could store the harvested beans in a moisture-proof and airtight container in your refrigerator. You could also blanch the beans and have it frozen to last your supply longer.
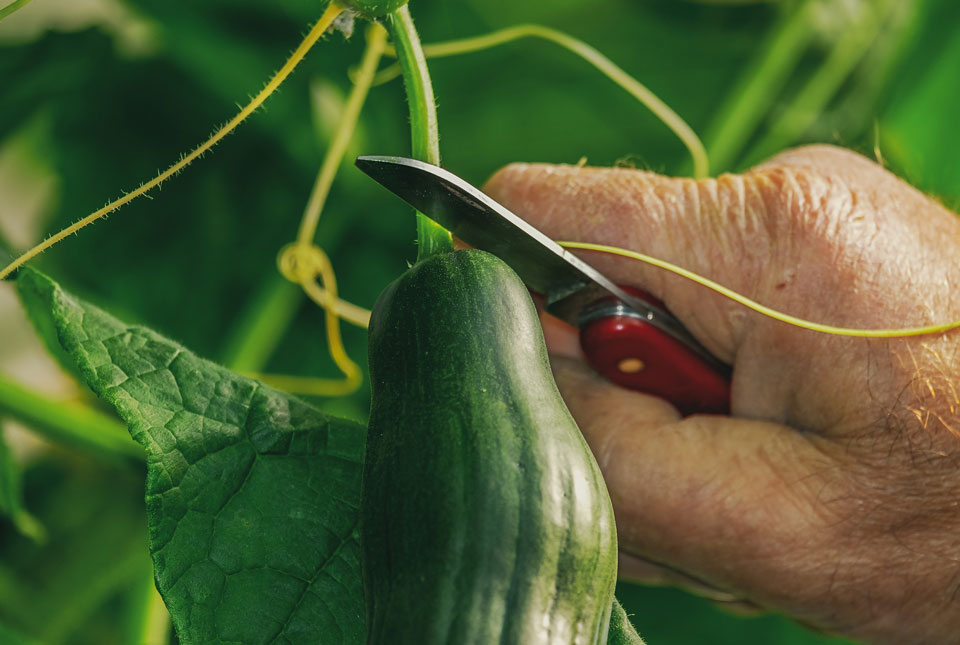
Cucumber
Time from planting to harvest: 50 to 70 days
Aside from the well-known use of cucumber in burgers as a pickle, cucumber is one of my favorite salad vegetables. Its watery content and mild melon taste will make you feel refreshed after consumption. Choose bush cucumber varieties since it requires minimal space and effort which would be perfect for beginners.
How to Grow Cucumber
- Choose a location that receives full sunlight.
- Add compost and manure into the soil by working on 6 to 8 inches of the topsoil layer.
- Sow the seeds one inch beneath the surface.
- Leave two to three feet space apart from the rows.
- Cover the seeds with soil and water evenly.
- Then, mulch the ground by using straws, chopped leaves, and other organic materials.
- Then, cover the garden bed with netting or berry basket.
How to Harvest Cucumber
When cucumbers reached are green and tender, they are ready for harvest. The size of cucumber ready differs depending on the use. Do not wait for the cucumbers to grow too long as it could result in bitter crops.
Use garden knife or clippers when harvesting. Cut just above the fruit. Cucumber could be stored in the refrigerator. But to prolong the shelf life, you could opt for the famous pickled cucumbers.
I hope that after reading this guide and seeing that you don’t have to wait for ever to grow your own vegetables you will start planting.
I love hearing from you so leave us your comments in the section provided below.

